
 USD
USD

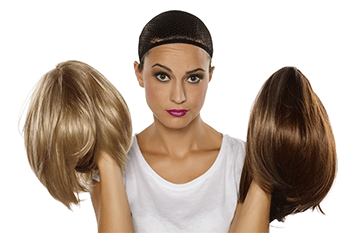
Find out How to Put on a Wig the Right Way
Posted by Superhairpieces on Jun 08, 2018
How to Put on a Wig the Right Way
What is one of the first things someone does when they need a change? They get a makeover; and if RuPaul's Drag Race has taught us anything, a great wig can give you confidence and make you feel F.I.E.R.C.E.!
Unfortunately, not everyone knows how to put on a wig and that is a big problem! When your wig isn't looking right, it'll throw off your entire look and there you are, looking like a hot mess.
Today, we are going to break down how to put on a wig properly so that you can step out of your house looking (and more importantly, feeling) like a queen!
How to Put on a Wig: Step By Step
When you're putting on a wig the first thing you will need to know is what kind of wig you're going to be wearing: a full lace or a lace front wig.
We'll go over how to put on a lace front wig.
Putting on a Lace Front Wig
When you're going to be wearing a lace front wig, you will need to do a skin test first. A skin test is going to determine if you have an allergy to the chemicals used in the glue or adhesive tape that'll keep the wig on your head.
To do this, you will want to dab a small amount of the adhesive glue onto the back of your hand. Then keep an eye on it for a full 24 hours.
You will want to look for any redness or irritation. If your skin is unaffected, you can safely put on your wig. If you do experience some redness, you will want to opt for hypoallergenic tape or glue.
Flattening The Hair
Next, you are going to want to flatten your hear. This is when a wig cap is going to come in handy - especially if you have long hair!
Before you put on a wig cap, you will want to do a few things:
- Braid your hair into cornrows
- Flatten hair to your head using hairspray, gel or bobby pins
- For Long Hair: Gather hair into a low ponytail and put it into a flat bun
It is important that all of your hair is contained. You don't want any loose strands poking out. Also, make sure the cap is covering your hairline!
Note: It's worth noting that if you have short hair, you can skip this entire step completely.
Preparing The Skin
After your hair is flattened (either by a cap or hair products), you will want to use a gentle cleanser on the skin around your hairline. After blotting the skin dry, you will then want to use a little bit of rubbing alcohol on a cotton pad and wipe along the hairline to remove any excess oils.
Note: If you have sensitive skin, you can apply a serum that will protect your scalp.
Putting On Your Wig
Once your hair and skin have been prepped, you will want to do a test-fitting to make sure your wig is going to fit properly.
To do this, you are going to line the wig up with your natural hairline. You can adjust the wig. This is when you will want to adjust any tightening straps the wig may have.
You will want to contact the wig manufacturer for help if your wig doesn't have straps and you experience:
- Tightness around your scalp where the wig rests
- The wig moves around when you turn your head
Trimming The Lace
When you've adjusted the wig to fit your head, you're going to have to trim the lace.
You can do this easily by pinning back the hair of the wig so that you have easy access to the lace.
Next, take sharp scissors or pinking shears to trim the lace so that only 1/8 of an inch is left. You'll only have to do this the first time you're putting on a new wig.
Note: Some wigs do not require trimming before wearing, so you'll want to read the packaging so you're certain.
Applying the Adhesive
When you're learning how to put on a wig properly, you're going to have a little bit of trouble with the adhesive application.
Using Wig Tape:
- Cut 8 to 10 pieces of tape.
- Line the tape up to your hairline and press the adhesive to your skin.
- Make sure there aren't any gaps between the tape segments.
- Use a mirror to create an even hairline.
- Remove the backing of the tape.
Using Wig Glue:
- Use a clean brush to apply adhesive in a thin line along your hairline.
There are two types of wig glue you can use. If you have a soft bond adhesive, you'll need to wait a few minutes for the glue to get tacky before putting the wig on.
If you are using a hard bond glue, you can put the wig on immediately.
Putting the Wig On
With the adhesive in place, you will want to carefully put the wig back on. Carefully, adjust the edge of the wig so the hair of the wig falls naturally on your head and is even with your natural hairline.
Once the wig is perfectly into position, you'll want to press the lace into the adhesive. It's important that you only do this once you are satisfied with the wig placement because the tape or glue is going to be difficult to remove otherwise.
Styling Your Hair
Now that your wig is in place, it's on to the fun part: styling your wig!
If your wig is made with human hair, you can use the same tools and products as you would on your own hair. However, if your wig uses synthetic hair, you will have to be more careful and avoid heat styling tools or regular brushes.
Final Thoughts on How to Put on a Wig
Learning how to put on a wig is one of the best and easiest ways to try out new hair colors, styles, and even lengths. When you're in need of a makeover but you don't want to commit to anything you'd regret, a wig is the perfect option.
Check out our blog for more tips, tricks, and advice about wigs, toupees, and anything else related to hair-pieces!

 Likes
Likes


