
 USD
USD

How to Wear Your Salon-Prepared Ready-to-Wear Hair System: A Step-by-Step Guide
Posted by Santana Fell on Jun 12, 2026
If you've just received your Superhairpieces salon-prepared, ready-to-wear hair system and you're not sure where to start, read this blog for a step-by-step guide.
Installing your hair system at home is simpler than you think with the salon-prepared units. With the right technique and a little patience, you can get a natural, secure fit every single time.
Let's walk through exactly how to do it.
What Is a Salon Prepared Ready-to-Wear Hair System?
A salon-prepard, ready-to-wear hair system is a non-surgical hair replacement solution that arrives pre-styled, pre-cut, pre-taped/glued, and ready to use immediately. Unlike stock hair systems that require cutting and customization, these come prepped by our hair stylists, so all you have to do is place them correctly, and you are good to go.
Read more: Superhairpieces Salon Prepared Ready to Wear Hair Systems
Note:This is the final step after your video consultation with our hair experts and upon the salon-prepared order's arrival.
What You'll Need Before You Start
Before you begin, gather these three essential tools:
- Two mirrors ( so you can see the back)
- Just Rite Positioning Spray
- A china marker pen
Having everything within reach before you start saves time and prevents mistakes during the application.
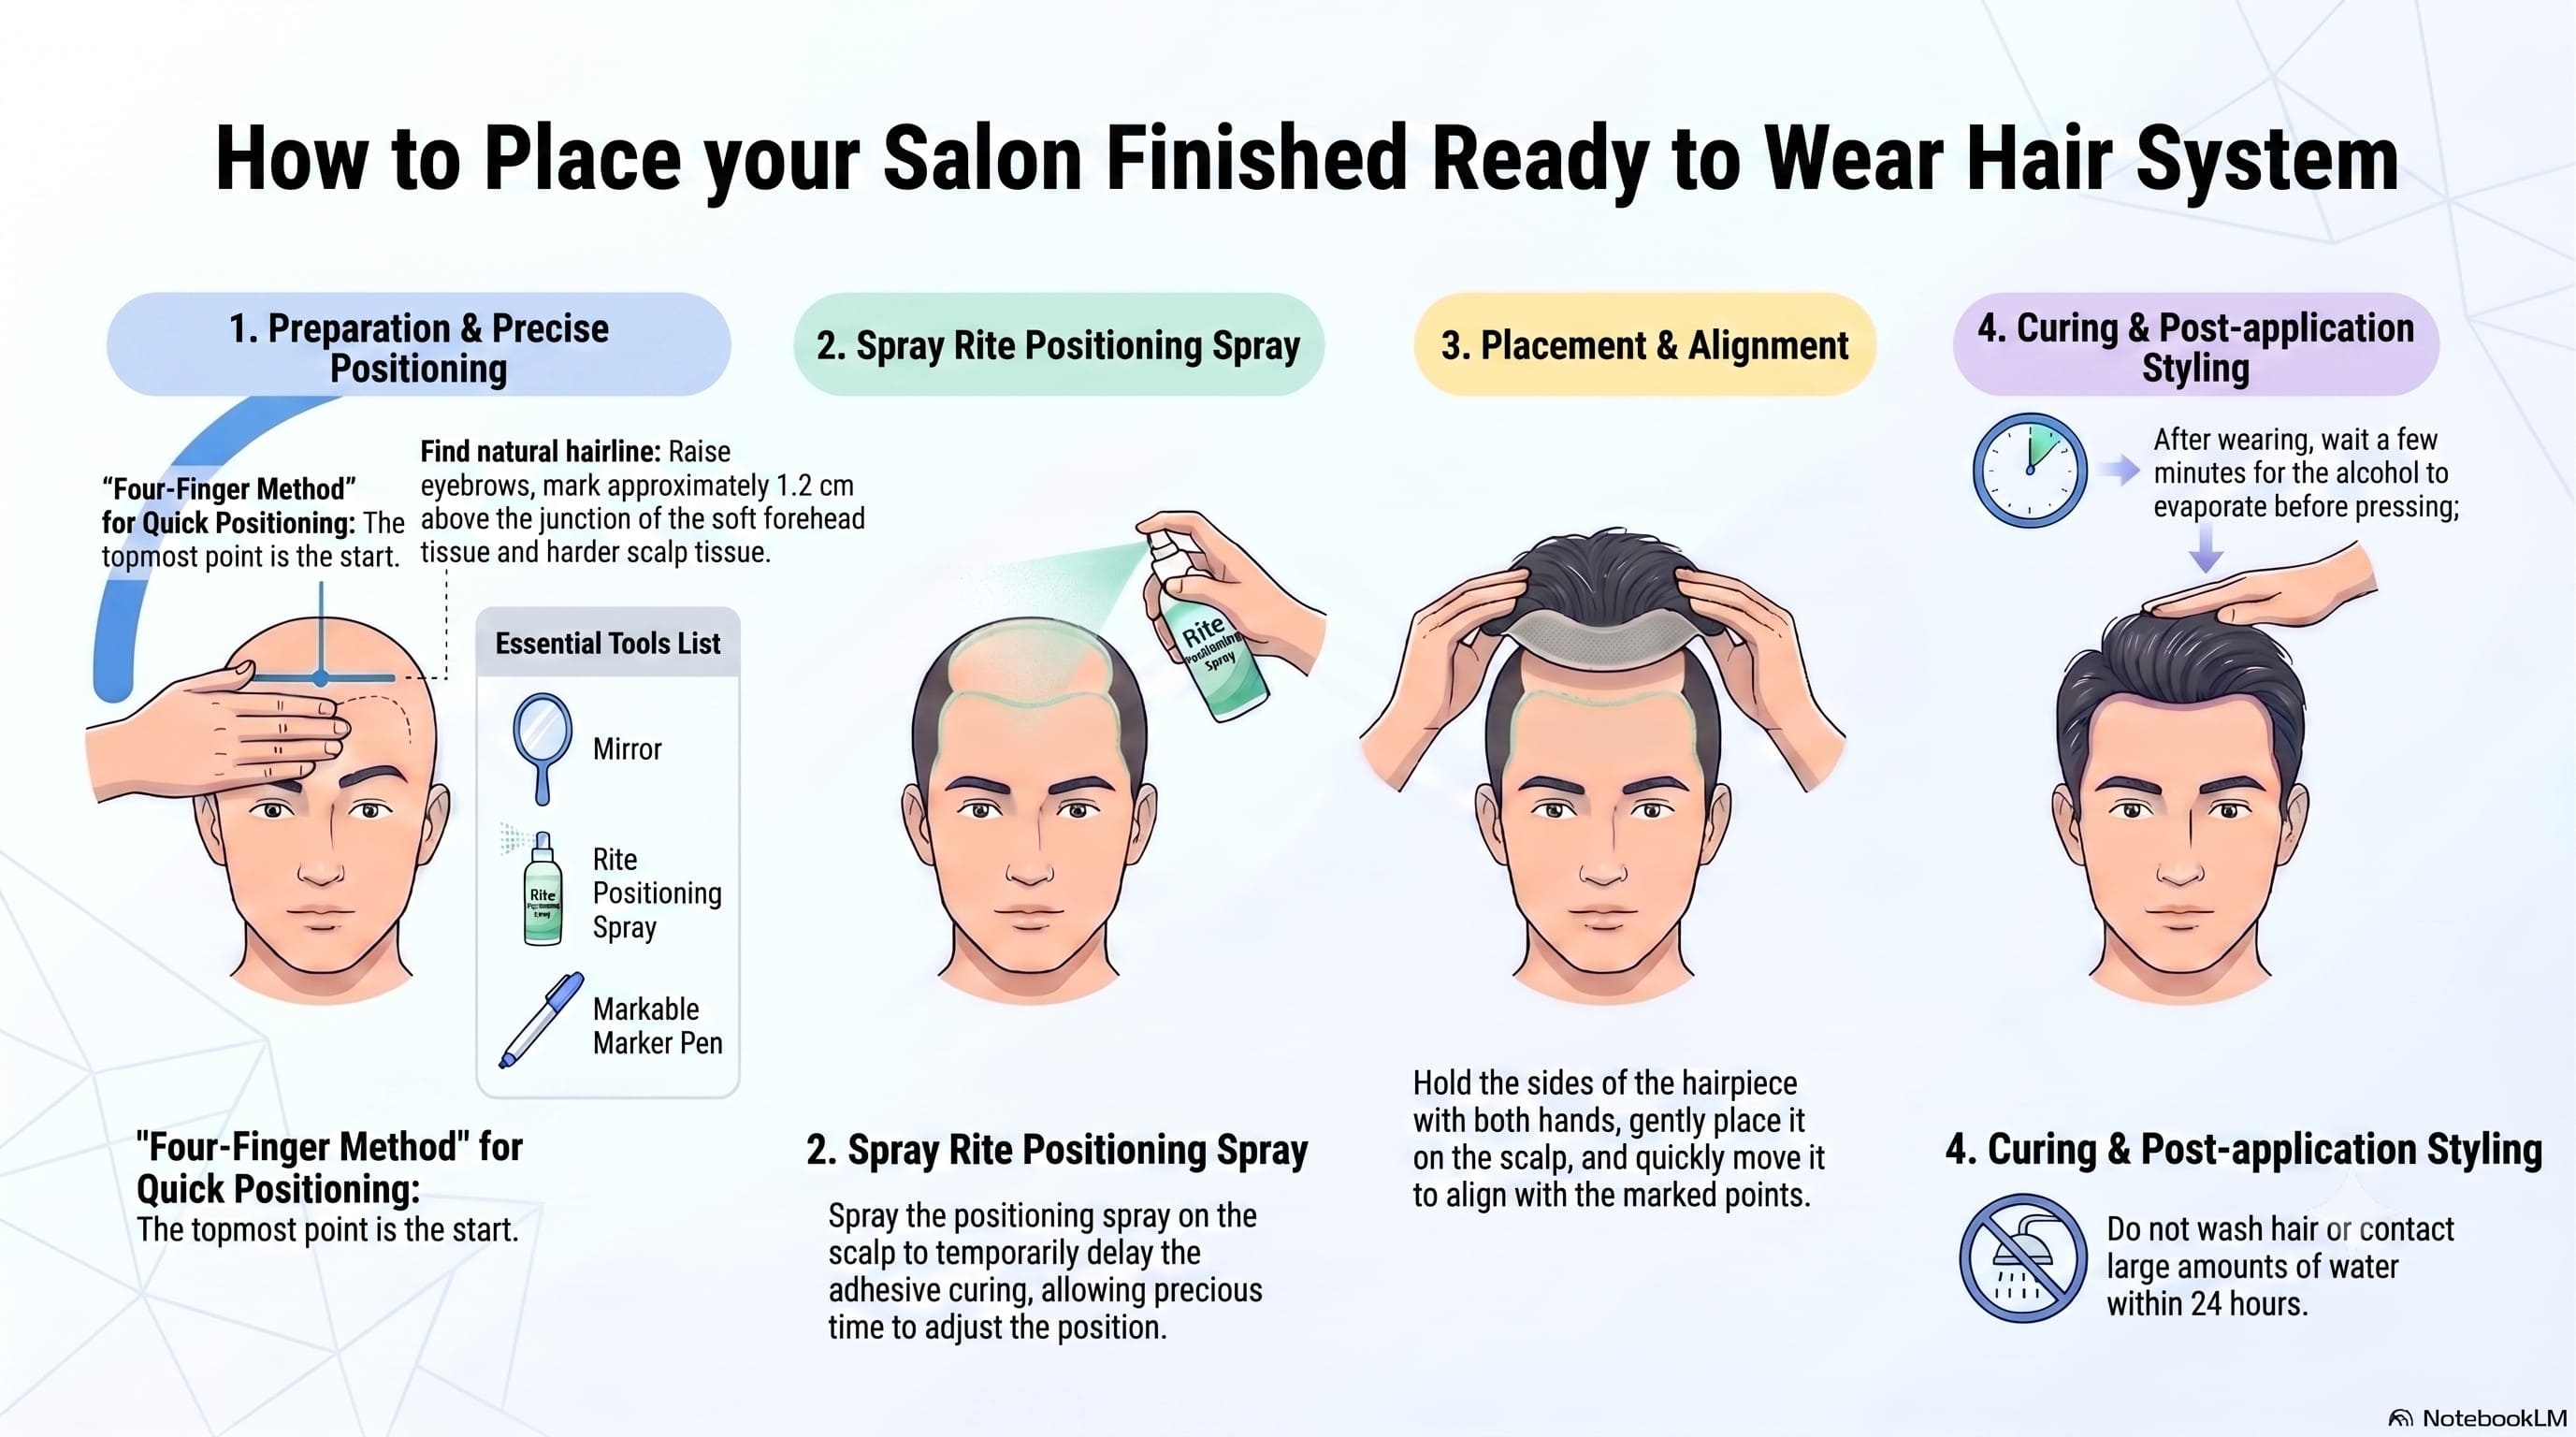
Step 1: Preparation and Precise Positioning
This is the most important step. Get this right, and everything else falls into place.
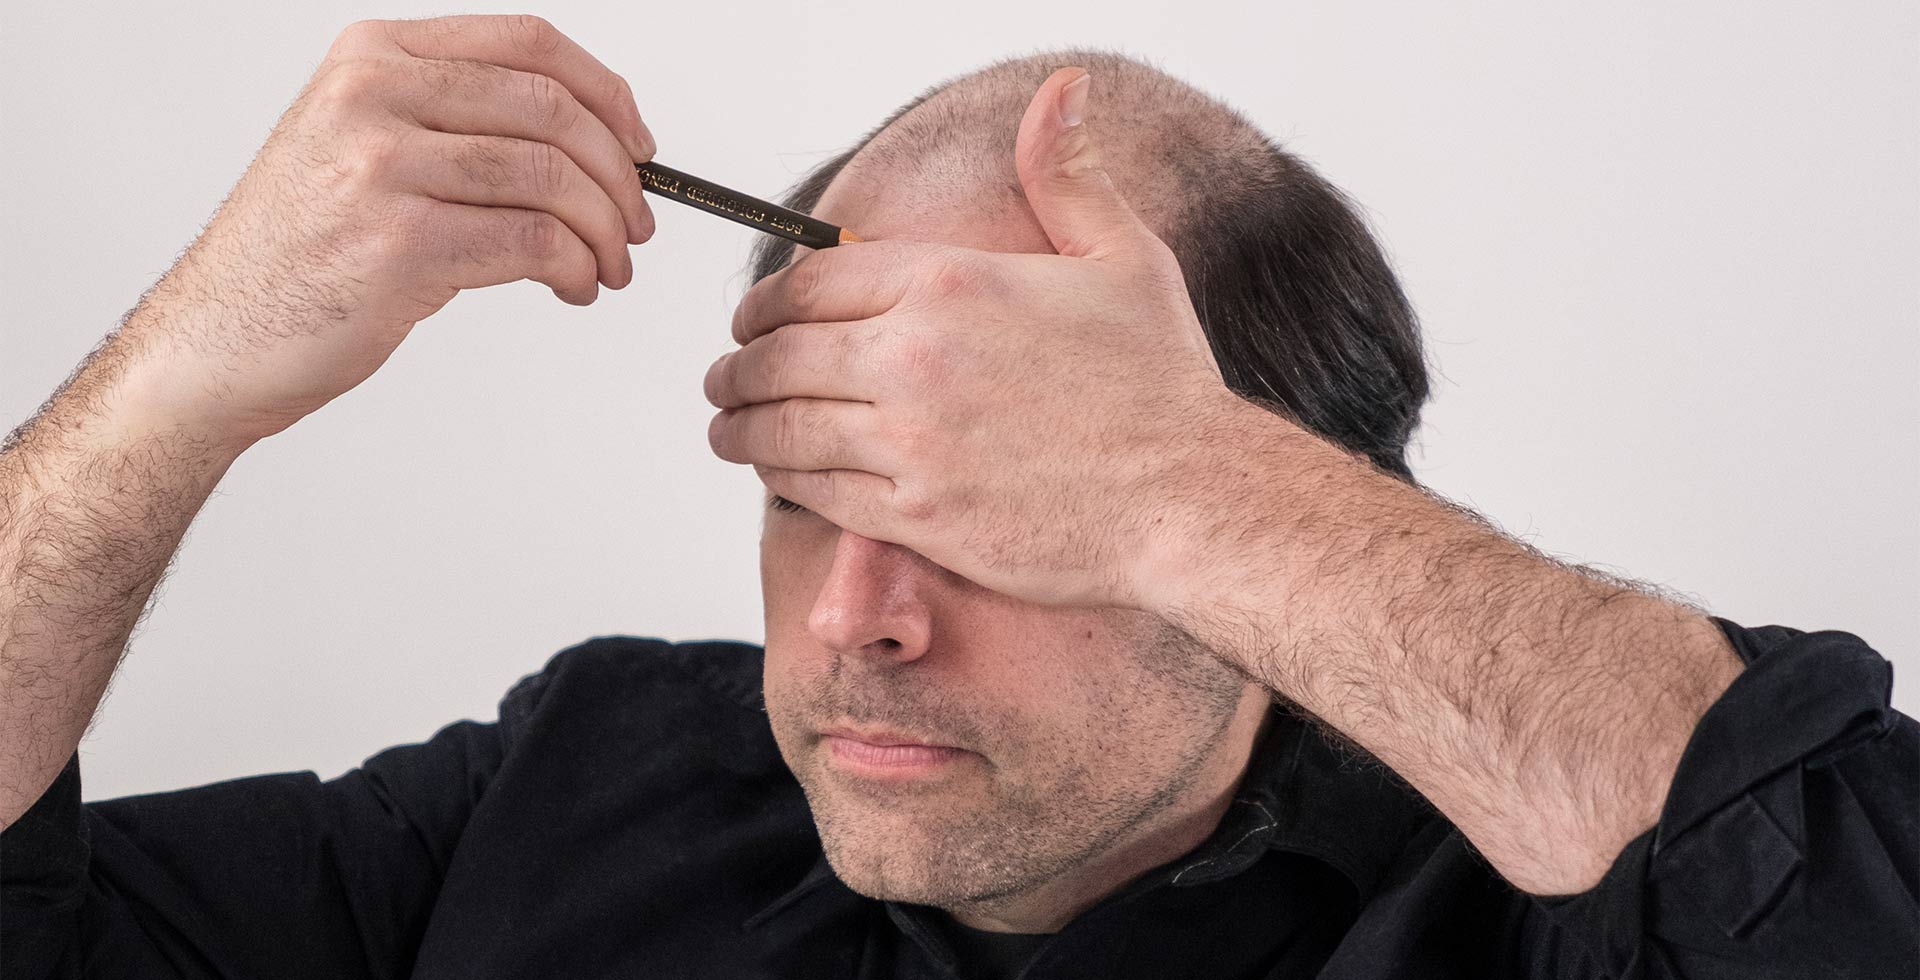
Find Your Natural Hairline
Raise your eyebrows naturally. Where your forehead skin shifts from soft to firmer scalp tissue, that's the start of your hairline. Mark a point approximately 1 cm above that junction. This is where your hair system's front edge should sit.
Alternatively, use the Four-Finger Method for Quick Positioning
Place four fingers horizontally across your forehead, starting from your eyebrows. The topmost point where your fingers end is your starting reference point. This method is quick and reliable, and it works for most head shapes.
Step 2: Apply Scalp Protector, and Just Rite Positioning Spray
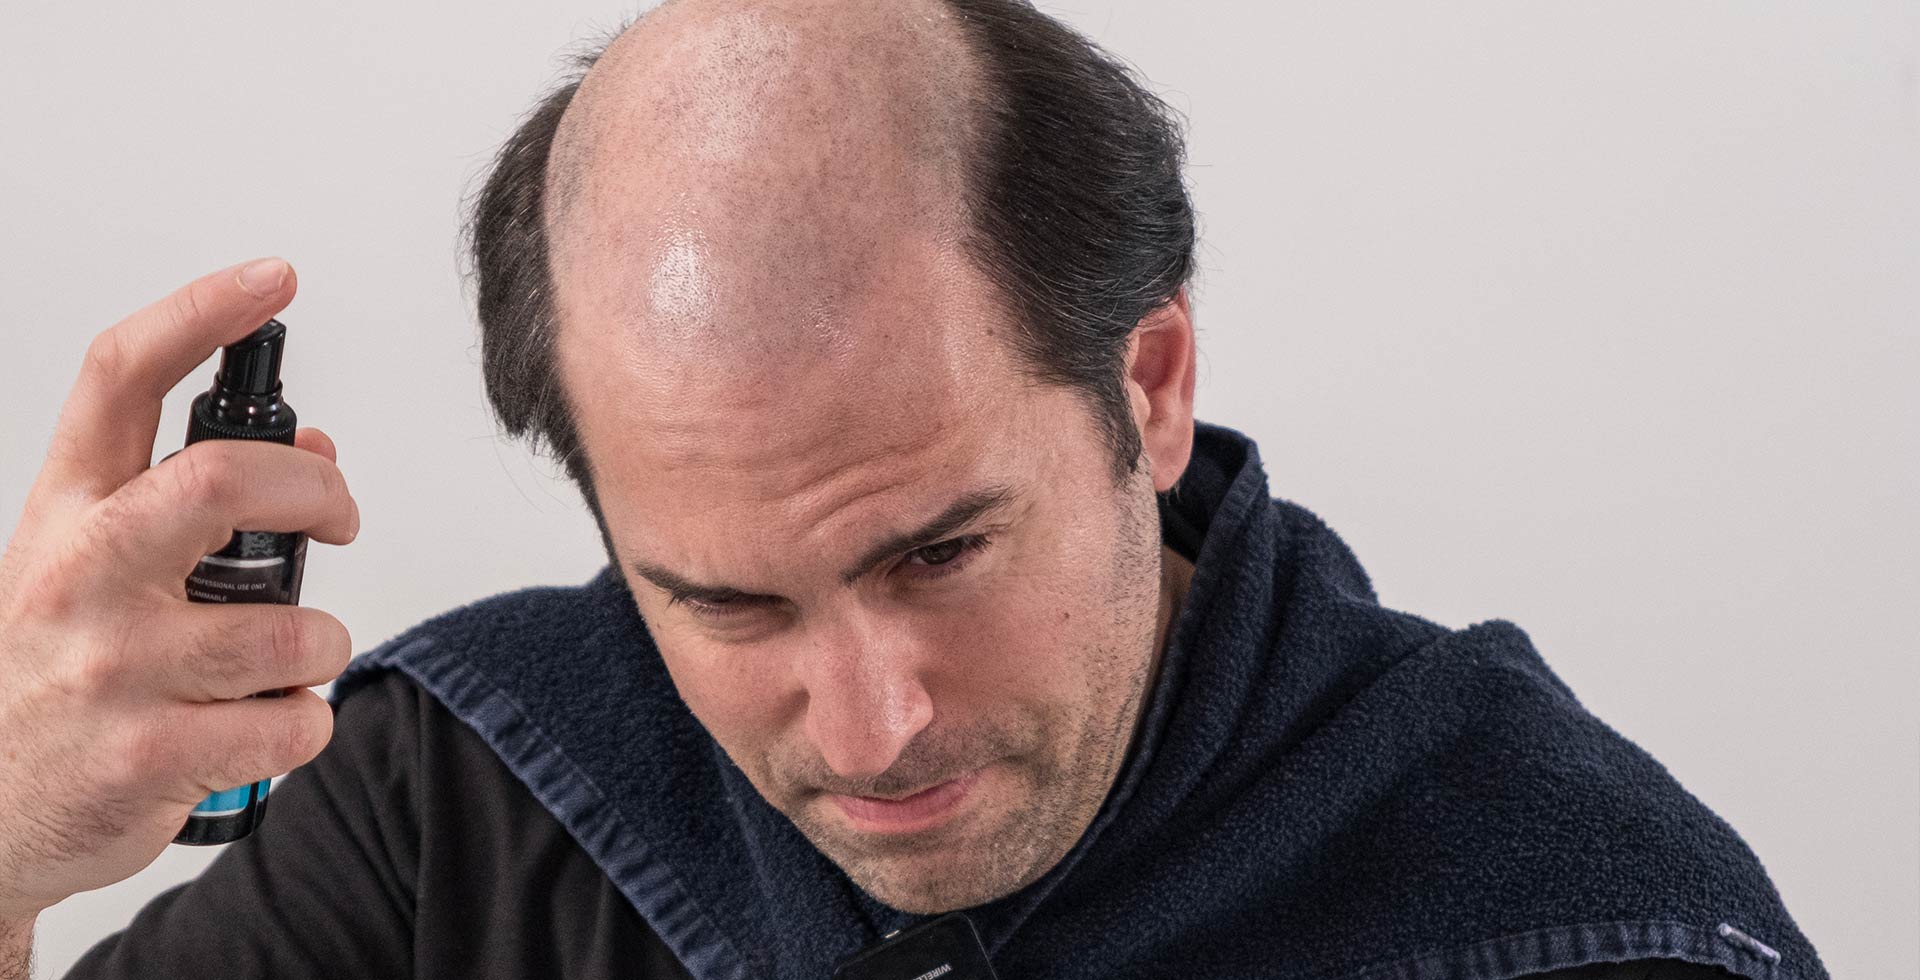
Once your scalp is marked and prepped with a scalp protector, spray the Just Rite Positioning Spray evenly over the adhesive on the pre-glued or pre-taped salon-prepared ready-to-wear hair system.
Here's why this matters: the positioning spray temporarily slows down the adhesive curing process. This gives you a window of time to adjust, reposition, and align the hairpiece before it fully bonds. It also helps remove hair from the adhesive if it gets caught accidentally. Think of it as your safety net; it buys you those precious extra seconds to get the placement perfect.
Don't skip this step. Trying to reposition a hairpiece after the adhesive has already cured is how damage happens.
Note: Ensure you have a clean, shaved scalp at the attachment area.
Step 3: Placement and Alignment
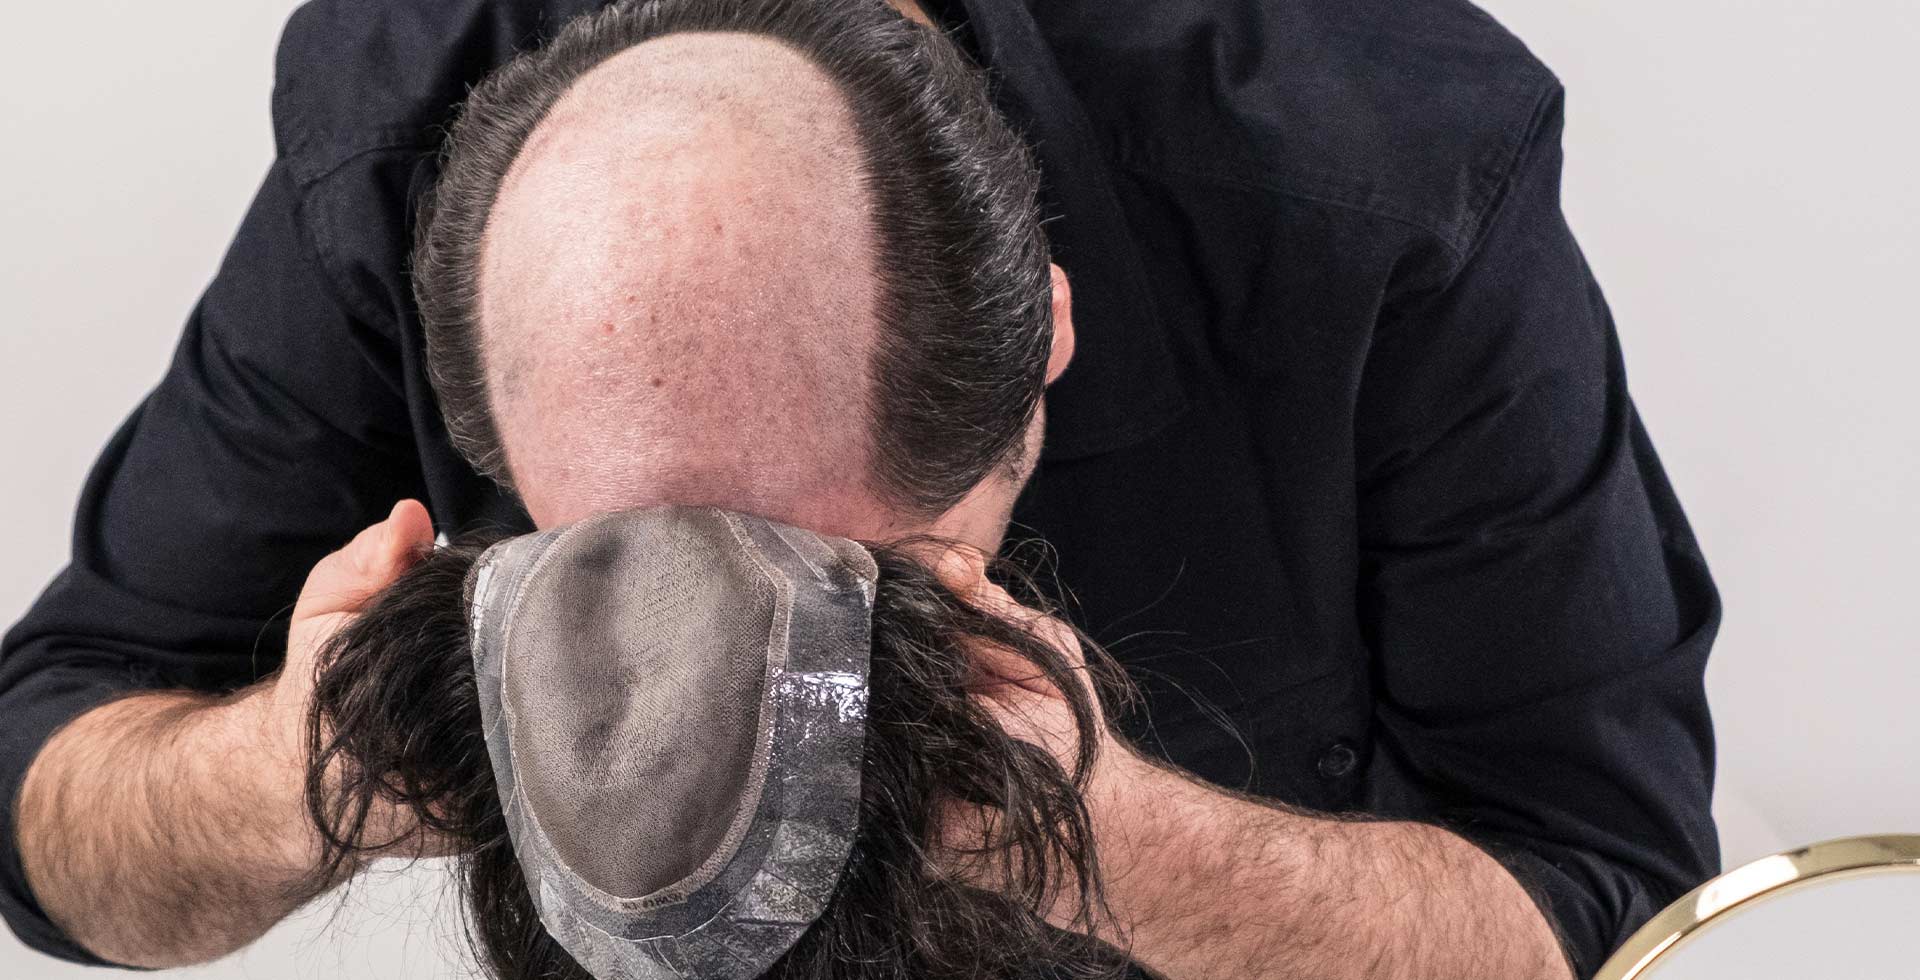
Now comes the actual placement.
Hold the hairpiece firmly with both hands. Gently lower it onto the scalp and guide it toward the marked hairline. Move it slowly and deliberately, don't just drop it on.
Once it's roughly in position, make small, careful adjustments until the front hairline aligns perfectly with your marked points and both sides sit evenly.
Take your time here. A few extra seconds of careful alignment make the difference between a natural look and one that's slightly off.
Step 4: Curing and Post-Application Styling
After placement, don't press down hard immediately. Wait a few minutes for the alcohol in the positioning spray to fully evaporate first. Once it has, press the hairpiece down firmly across the entire base to ensure a full, even bond.
Important post-application care:
Do not wash your hair or expose the hair system to large amounts of water or sweat within the first 24-48 hours. The adhesive needs time to cure and set fully. Getting it wet too soon weakens the bond and shortens wear time.
After the 24-48-hour window, you can style as usual.
Note: Although the hair system comes pre-styled, you can adjust the hairstyle to suit your preferences. Since the hairpiece will generally be freestyle, you can give it a quick rinse or spray it with water to change the style.
Salon Prepared Ready-to-Wear Hair Systems – the real deal
Superhairpieces’ Salon Prepared Ready-to-Wear Hair Systems are the complete solution to your hair loss needs without you having to step out to a salon.
You get the full salon-prepared style from the comfort of your home. Unlike a few other hair system companies, we don’t just send the hair system with a haircut, but a fully ready-to-wear hair system that comes shampooed, conditioned, pre-glued or pre-taped, with antibacterial protection, leave-in conditioner, base cut, and the whole deal. It doesn’t get better than this!
The more you practice, the faster and easier the process becomes. Most people find that after two or three applications, the whole thing takes less than a few minutes.
Have more questions about our salon-prepared, ready-to-wear hair system service? Call us or book a free consultation now!

 Likes
Likes


